Welcome to Wreath Week!
After today's post, you'll know everything you need in order to make a gorgeous natural wreath base, you lucky things!
{And did I mention free?}
They're pretty quick to do once you know how and the best thing is, the base can easily be made from prunings from your garden, or the local countryside.
{And did I mention gorgeous?}


And in it goes...


{Are you with me so far? You are? I've always thought you were particularly clever...}


{And did I mention free?}
They're pretty quick to do once you know how and the best thing is, the base can easily be made from prunings from your garden, or the local countryside.
{And did I mention gorgeous?}

Then, over the next few days, I'll share how I've made several different styles of wreath: from the lovely and natural to the super-duper festive!!
On Friday, I'm going to have a Wreath Party for people to link up all your beautiful wreaths. And guess what? You're ALL invited!
Yes, I've made my first ever button to celebrate my Wreath Party.
{Oh my goodness, I can't even begin to tell you how long this took me...}
Please would you mind putting this button on your sidebar to spread the word?
{If you have Blogger, just copy the html in the box below the button and paste into the html widget on your side bar in the design page of your Dashboard}.
THANK YOU!
Wreath bases can be made from any long and pliable stems. The best kind to use are willow, honeysuckle, vines and ivy but if you know another kind of tree with long bendy stems that needs a cut, then by all means use those!!
{Okay, ready? Do you have your stems? Then off we go....}
Step 1
Start off with three or four long stems, which will end up being roughly the circumference of your finished wreath. Lay them out in parallel but stagger them slightly, like this:
Start off with three or four long stems, which will end up being roughly the circumference of your finished wreath. Lay them out in parallel but stagger them slightly, like this:

Tie them together together once at each end with jute string.

One end...

...and then the other end...
Step 2
Now bend the whole thing round to form a circle. Let the ends cross over at the top.

...and tie together where the two ends cross over.

Pull the loose ends down each side of the circle, twisting them round the rest of the stems....

...and tie in place with jute string.
Please don't worry if at this point it's all looking rather messy and not very circular. The beauty of this method is that the shape is made firmer as more stems are added.
{See? Mine is pretty messy at this stage, even though I've done it lots of times before...}
{See? Mine is pretty messy at this stage, even though I've done it lots of times before...}

Step 3
Now, get another stem and poke the thicker end into a gap in the wreath base to secure it. Use the less pliable stems at first and leave the very bendy ones until the end.
Here, I am poking my stem into the wreath base:
Now, get another stem and poke the thicker end into a gap in the wreath base to secure it. Use the less pliable stems at first and leave the very bendy ones until the end.
Here, I am poking my stem into the wreath base:

And in it goes...

Start wrapping it around the other twigs. The easiest way to do that is to bend it gently through the middle if the circle.....

...and out the other side, and then bend it round again gently, up and over the outside of the wreath, in through the middle of the circle, and out the other side. Towards the end of the stem, it's usually much more pliable and can be wrapped more tightly without the risk of breaking it.

...but if it does snap...and some probably will....it doesn't matter one jot. Either tuck it in as neatly as you can, or take it out altogether, and start again with a new stem.

When you get to the end, just tuck it into the other stems in the wreath base to secure it.

And then repeat with the next stem.

And the next....wrapping each stem in and out of the centre of the circle as many times as you can.

With each stem, take a step back and see which part of the wreath most needs shaping and then concentrate on that part.
For example:
For example:
Can you see that my wreath is wonky here:

so that's where I concentrated my efforts, pulling extra tightly around that area. Keep going until it looks something like this:

{Are you with me so far? You are? I've always thought you were particularly clever...}
Step 4
If your wreath base is looking slightly misshapen, you can squeeze it a bit on either side to push it into shape. This is the way I do it:
If your wreath base is looking slightly misshapen, you can squeeze it a bit on either side to push it into shape. This is the way I do it:

Step 5
If you notice any stray ends, just snip them off with sharp scissors or secateurs.
If you notice any stray ends, just snip them off with sharp scissors or secateurs.


Step 6
Now that you're near the end, make sure you choose the super-bendy stems to work with. These will form the holes to tuck your wires and foliage into later....

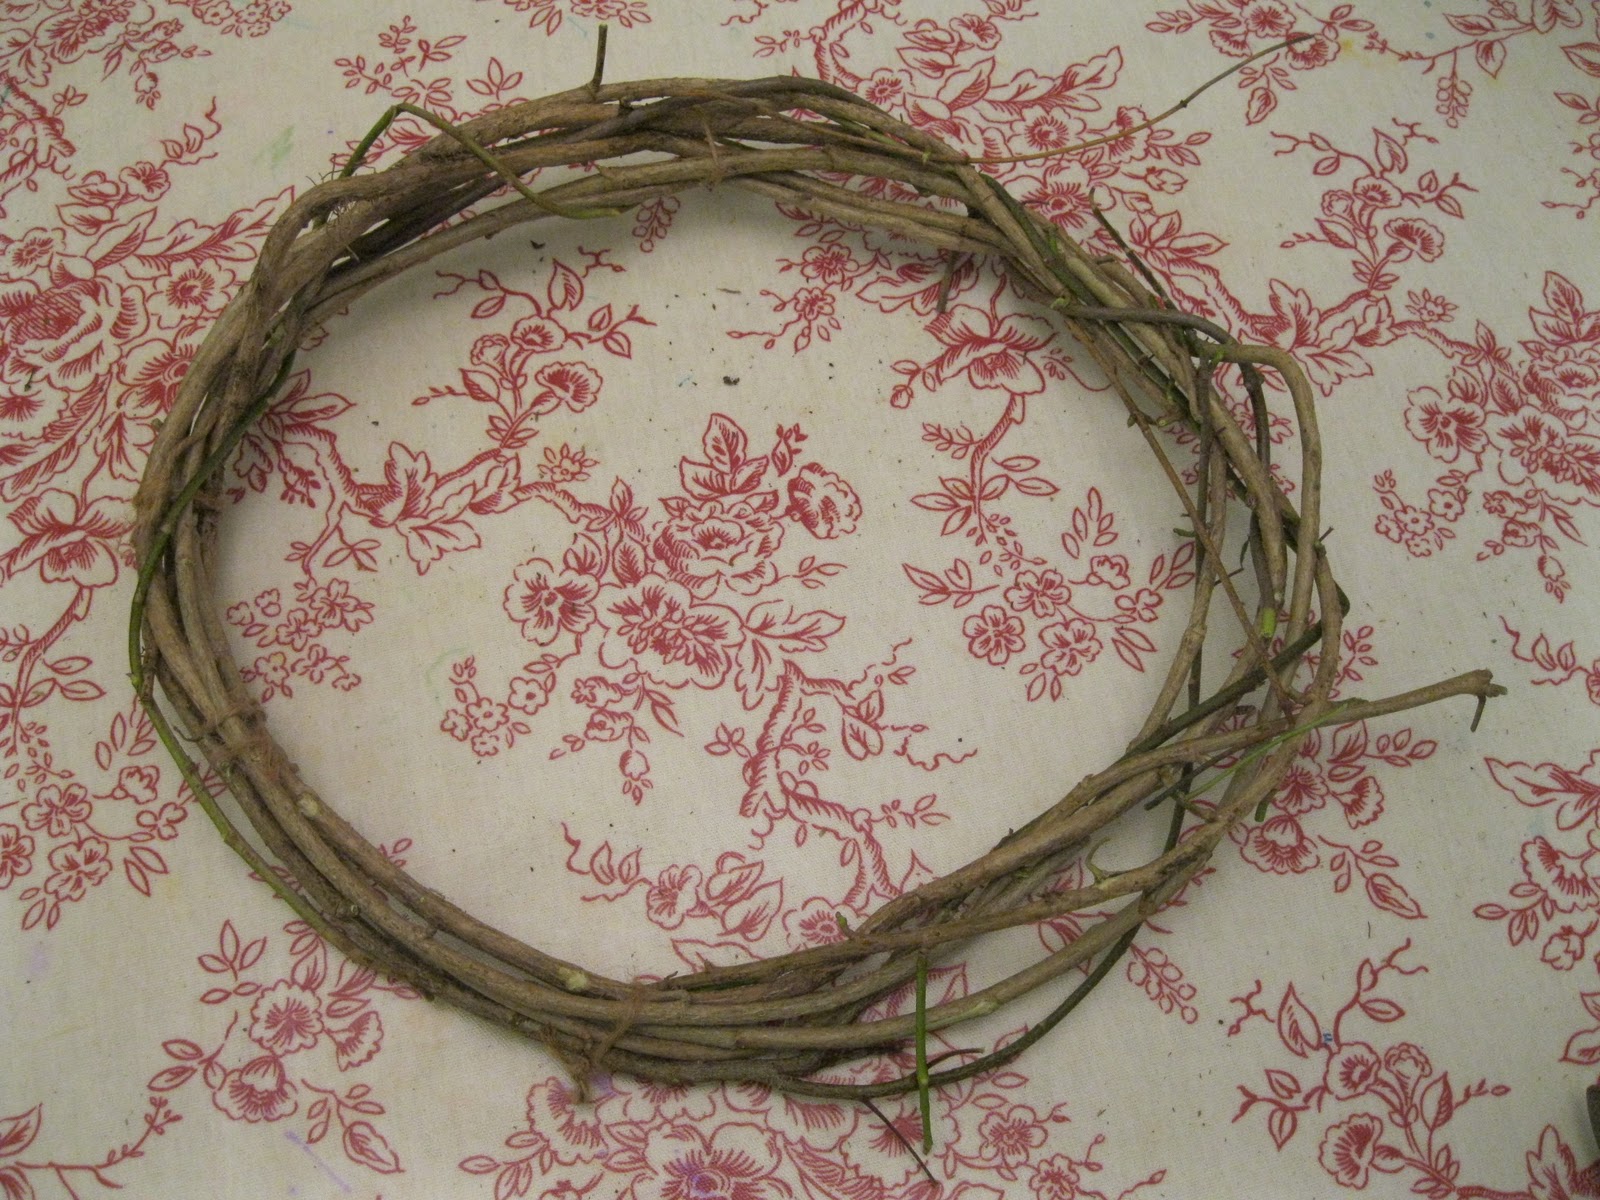
Then, when you've finished, stand back and admire your beautiful wreath base.
This probably took me about fifteen minutes, including cutting the stems from my garden.

{And at least five minutes of that was gearing myself up to venture out into the snow for you...}

I love making wreath bases. They're incredibly satisfying.
But best of all is that now you've got the perfect foundation for making some absolutely stunning wreaths.
Come back tomorrow and I'll show you how...
{Hint: You're gonna love me forever}


0 comments:
Post a Comment